Creating an App
You create apps in the Developer Portal — no API or code required. Each app gets a Client ID and Client Secret (shown once after creation) and can have its own redirect URI, scopes, icon, and later a store listing.
Start creating a new app
Log in to the Developer Portal, then in the left sidebar under Platform click My Apps. You’ll see your existing apps (if any) and two ways to create a new app: the Create App button at the top right, or the + Create New App dashed card.
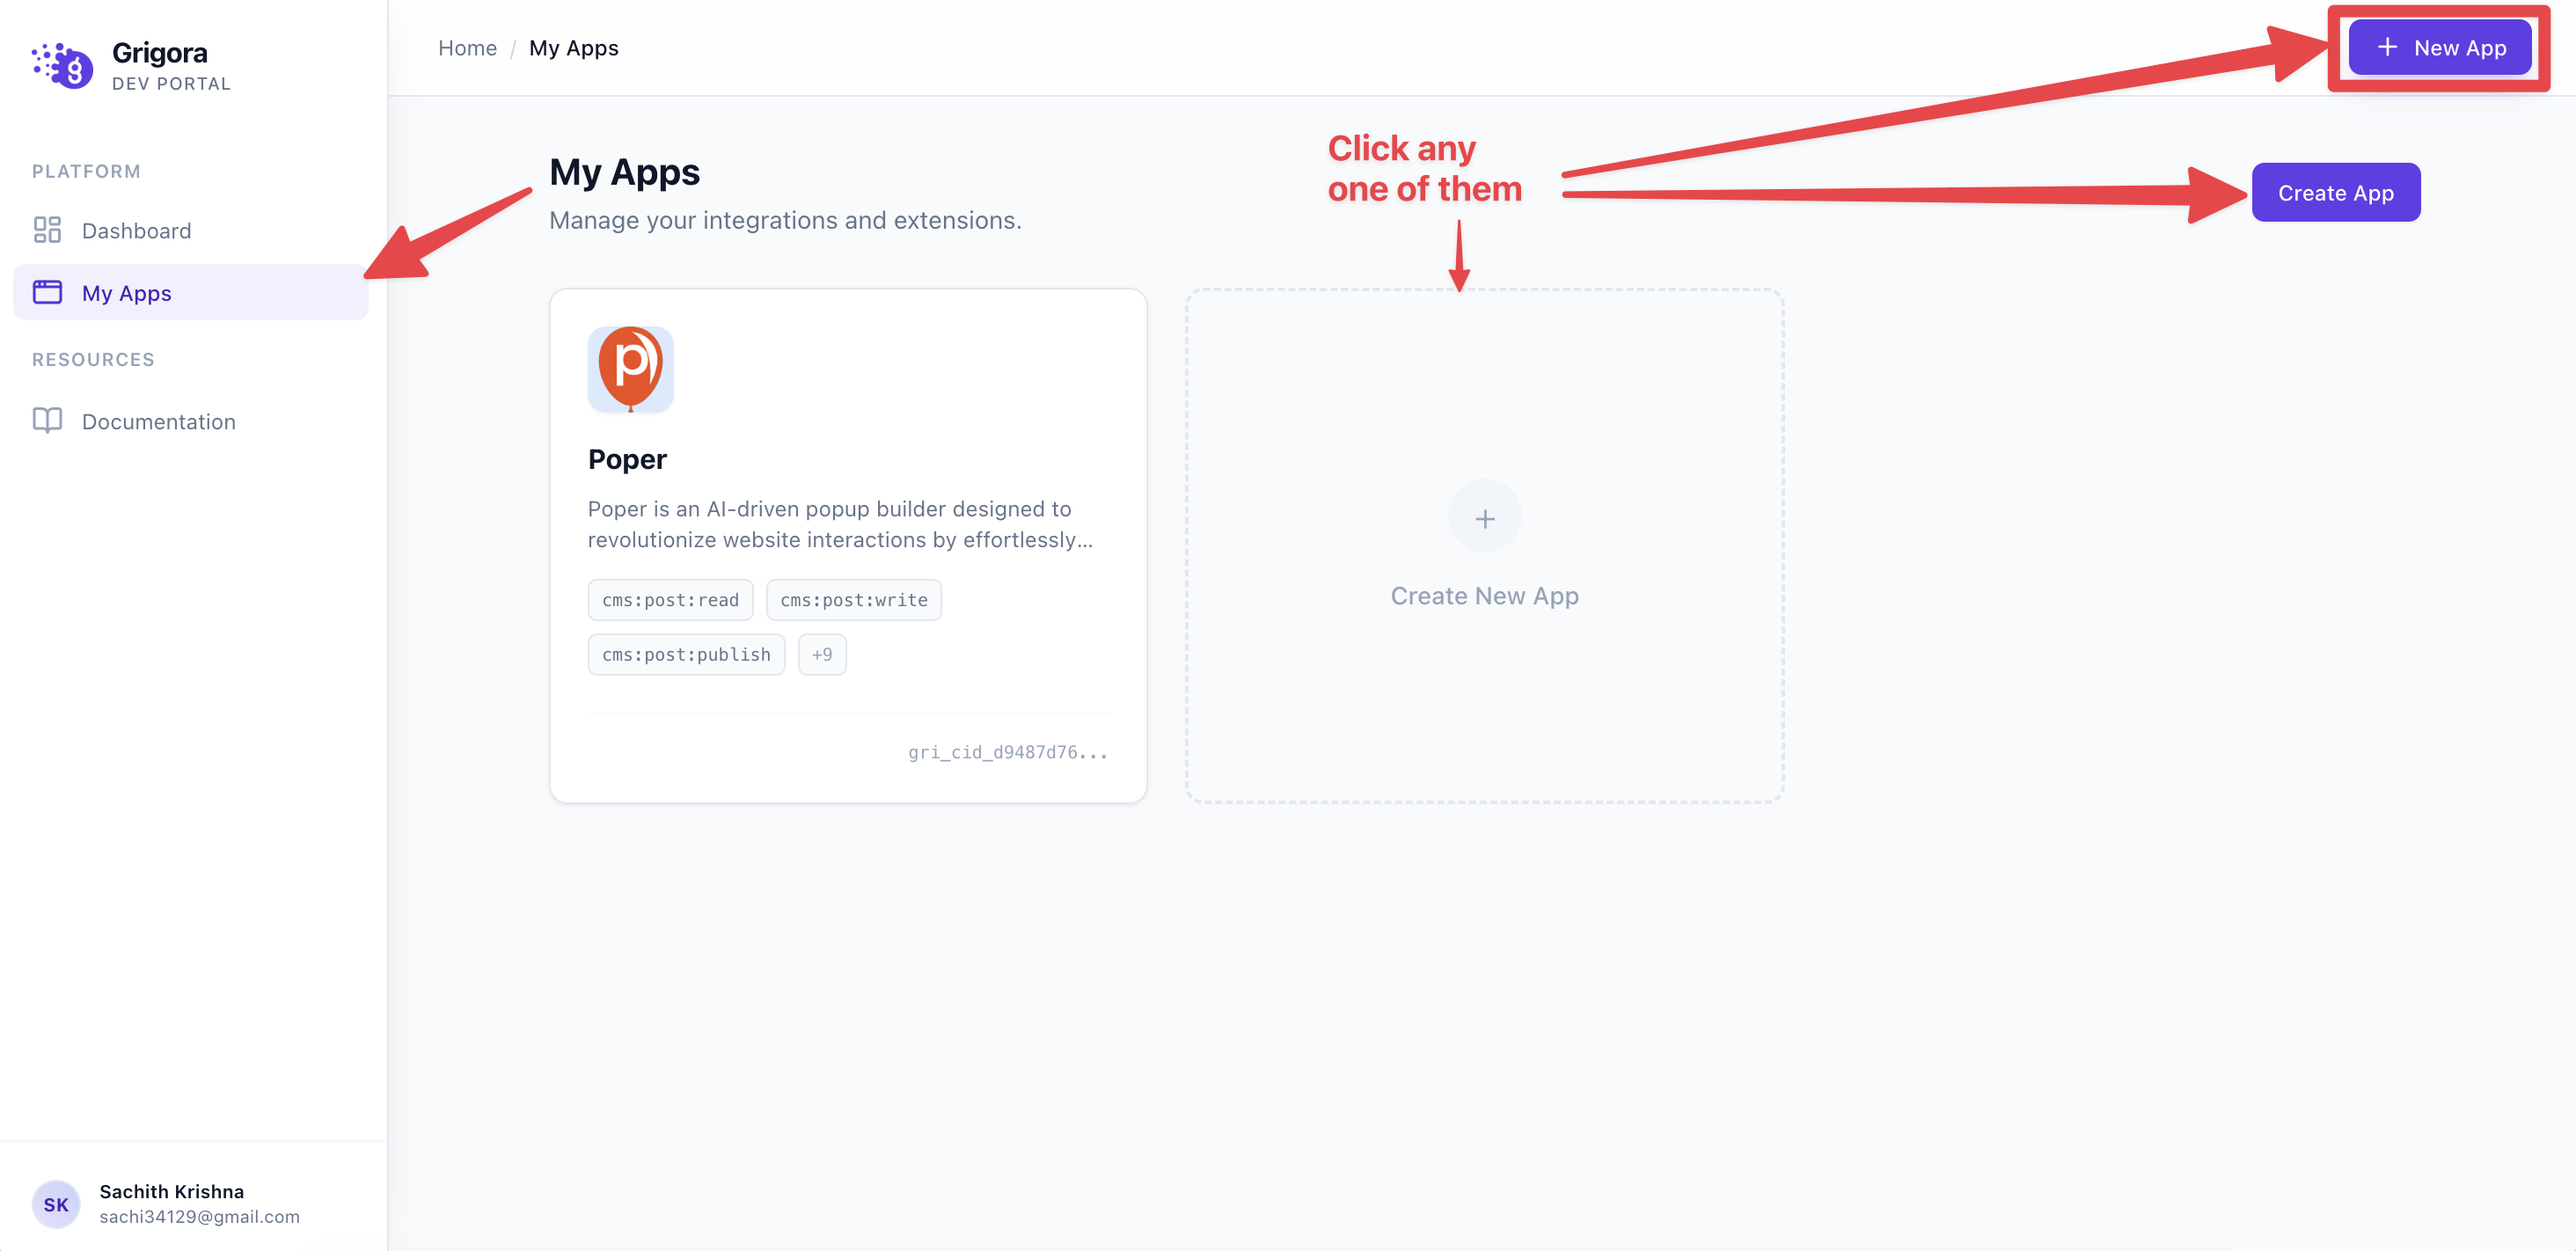
Click either the Create App button or the + Create New App card to open the create app page.
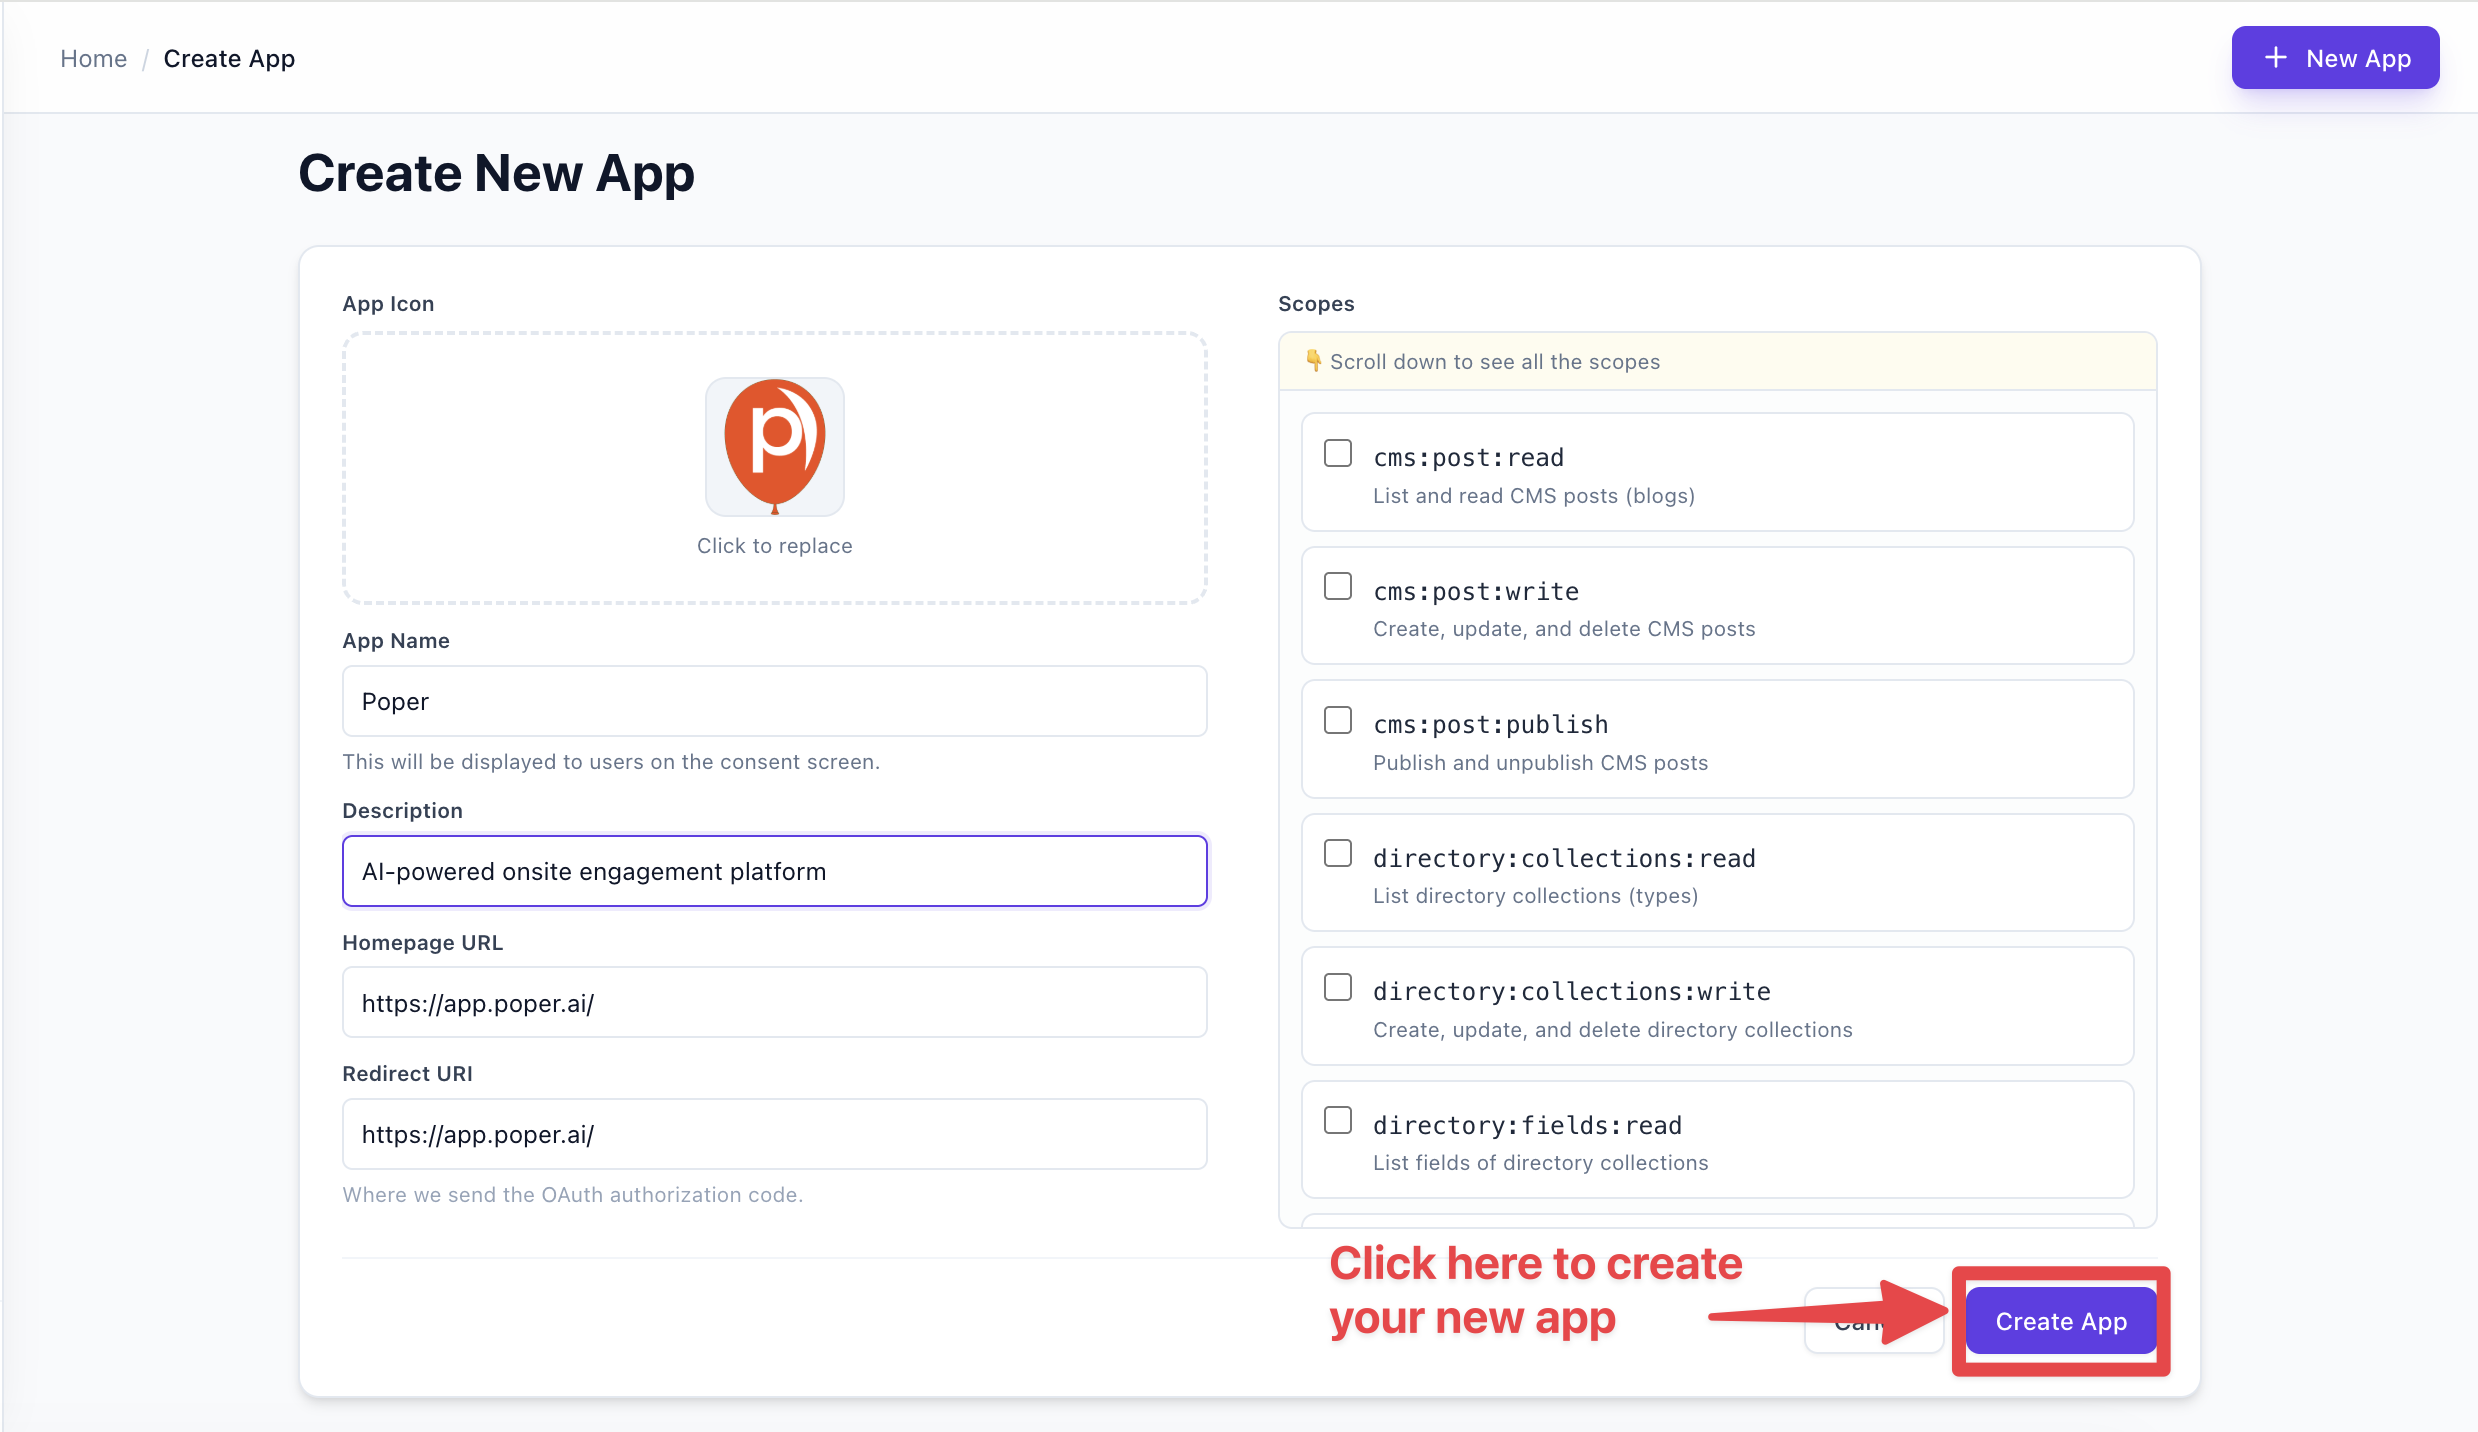
On the Create New App page you’ll see:
- App Icon — Optional upload (PNG, JPG, JPEG, SVG, or WebP; max 2MB). Shown on the consent screen and in the Grigora App Store. You can add or change it later in the app’s Settings.
- App Name — Required. Display name shown to users on the consent screen.
- Description — Optional. Short description of what your app does.
- Homepage URL — Optional. Your app’s or product’s homepage.
- Redirect URI — Required. The full URL where Grigora sends the user after they approve (e.g.
https://yourapp.com/oauth/callback). You can add more later in Settings. - Scopes — Optional. Check the permissions your app needs; users see these on the consent screen. You can change them later in the app’s Settings (Permissions tab).
- Cancel and Create App — At the bottom. Use Cancel to return to My Apps without saving.
Scopes
Scopes are listed with checkboxes. Each row shows a scope ID (e.g. cms:post:read) and a short description.
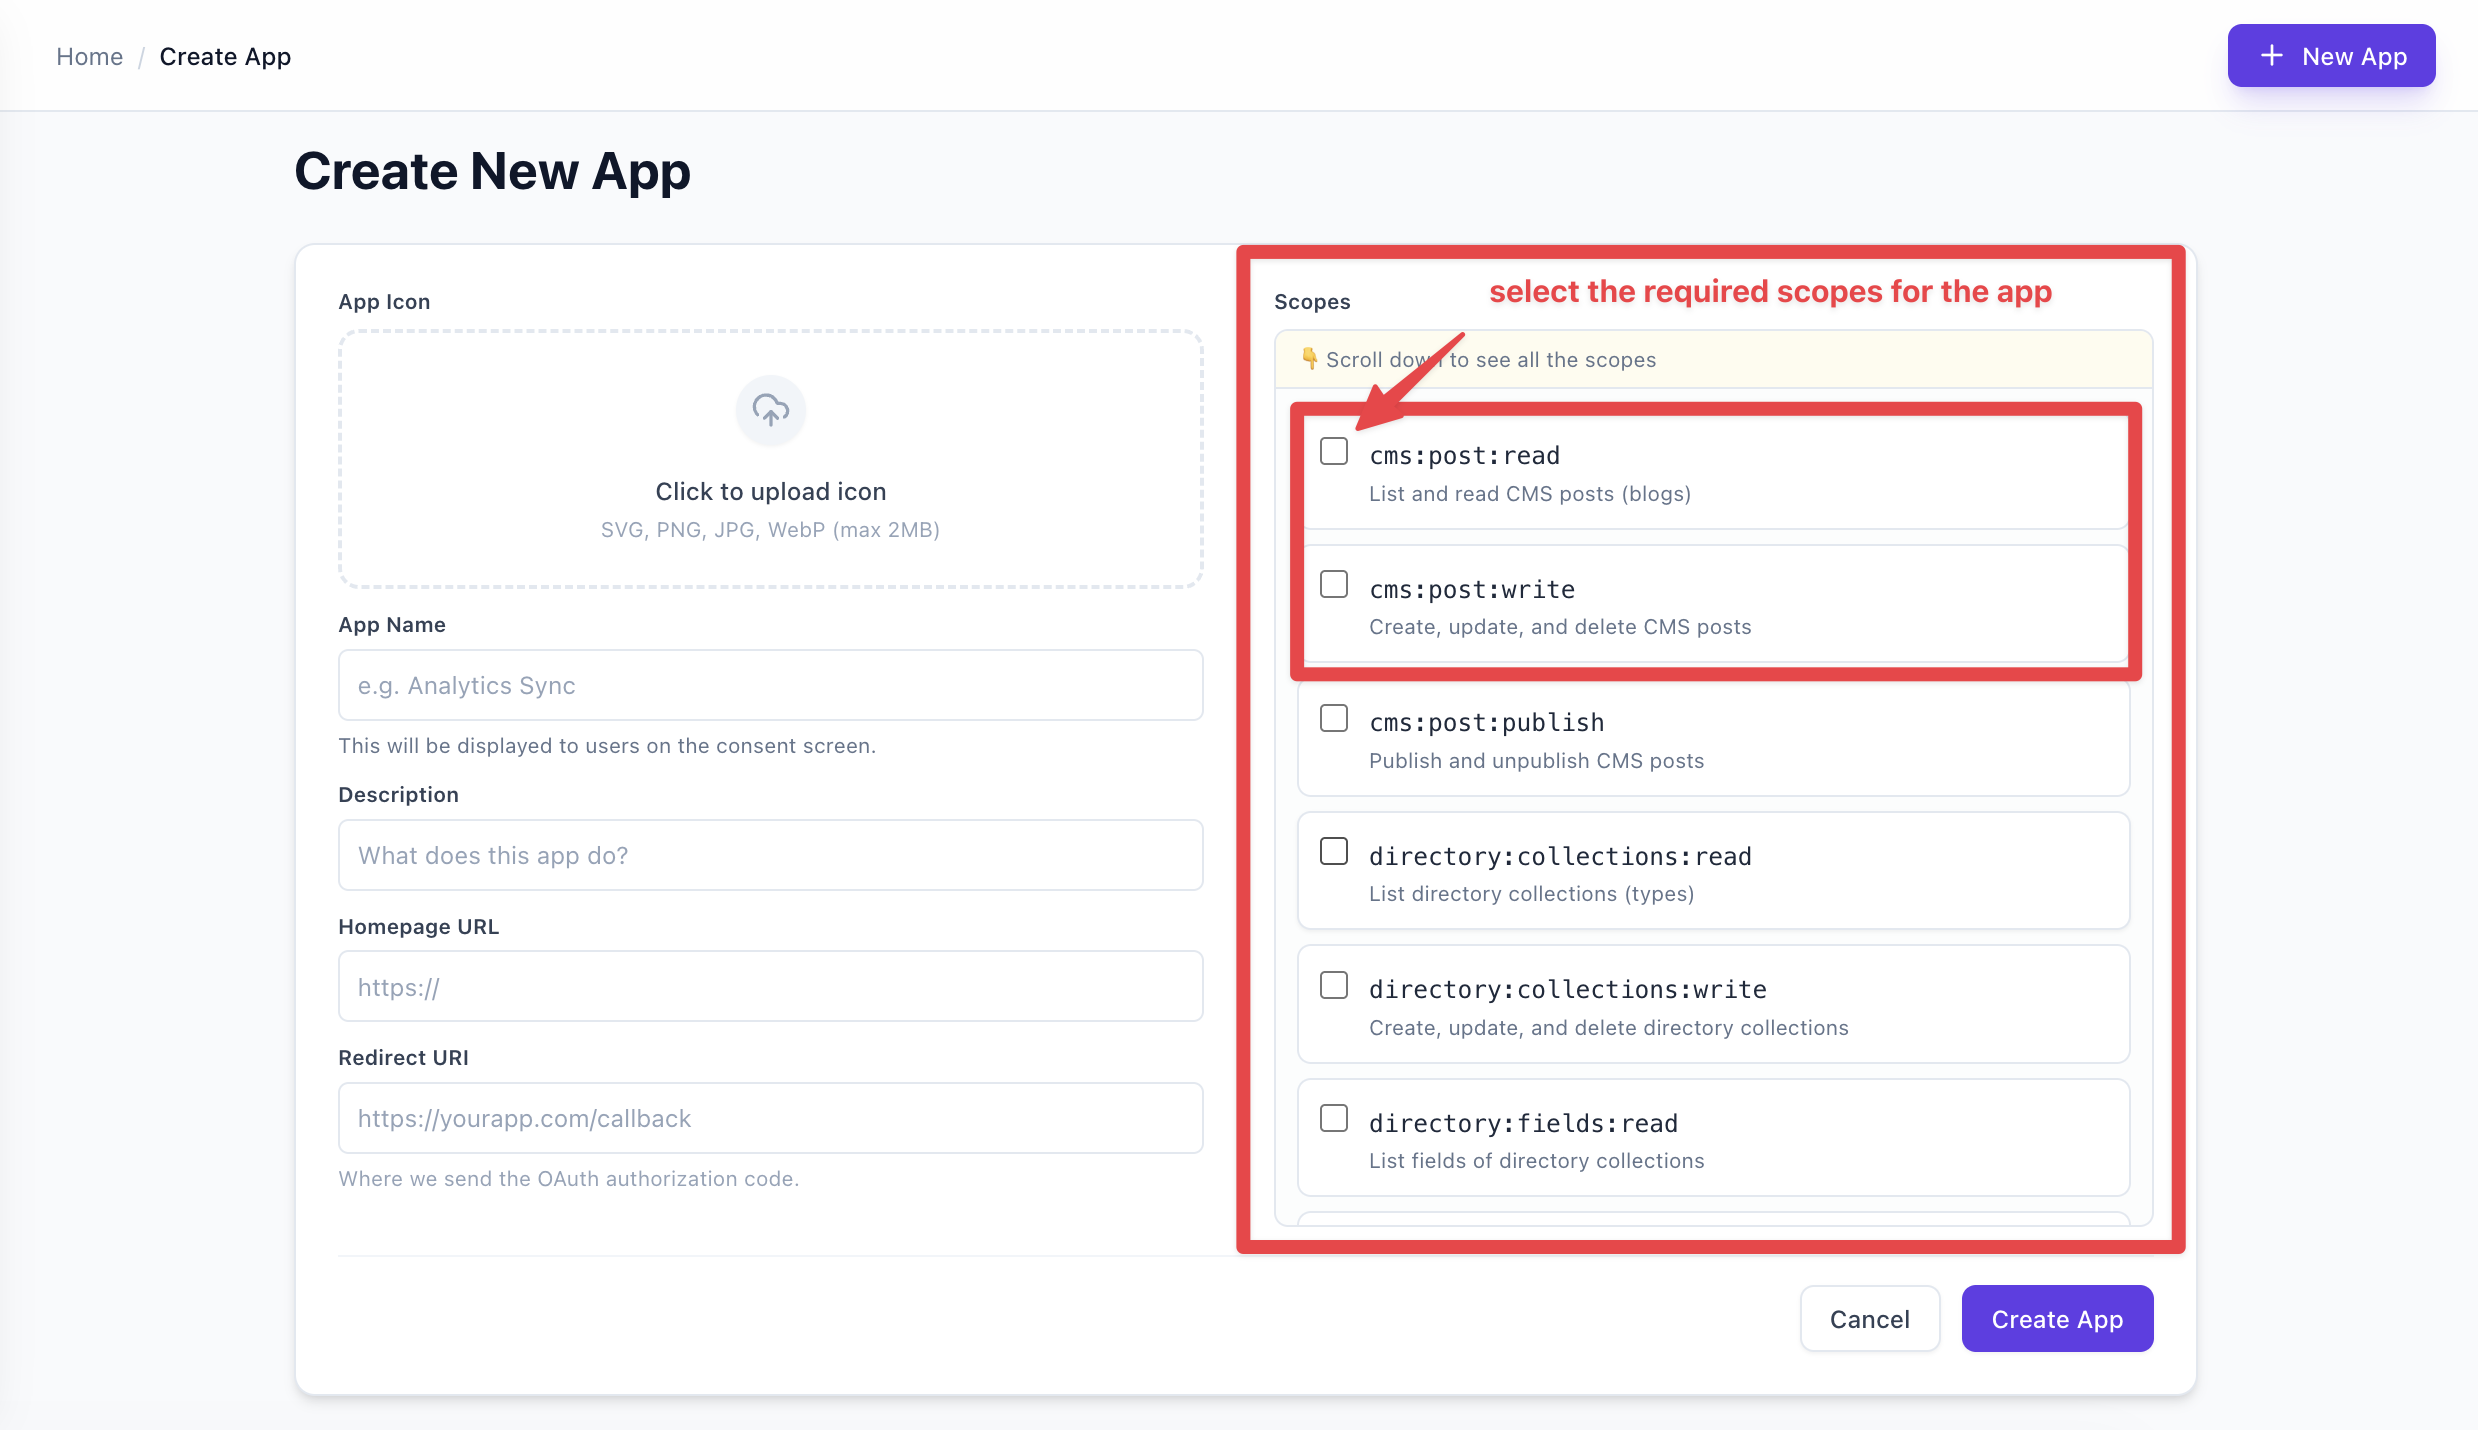
Categories:
| Category | What the scopes are for |
|---|---|
| CMS | Read, write, or publish blog/CMS posts. |
| Directory | Read or manage directory collections, fields, and items. |
| Scripts | Read, embed, or remove embedded scripts on a user’s project. |
Create the app
Click Create App at the bottom right. If something is wrong (e.g. App Name or Redirect URI is missing), an error message appears in a red box above the buttons — fix the values and click Create App again. While the request is in progress, the button shows Creating... and is disabled. To leave without saving, click Cancel to return to My Apps.
Save your credentials
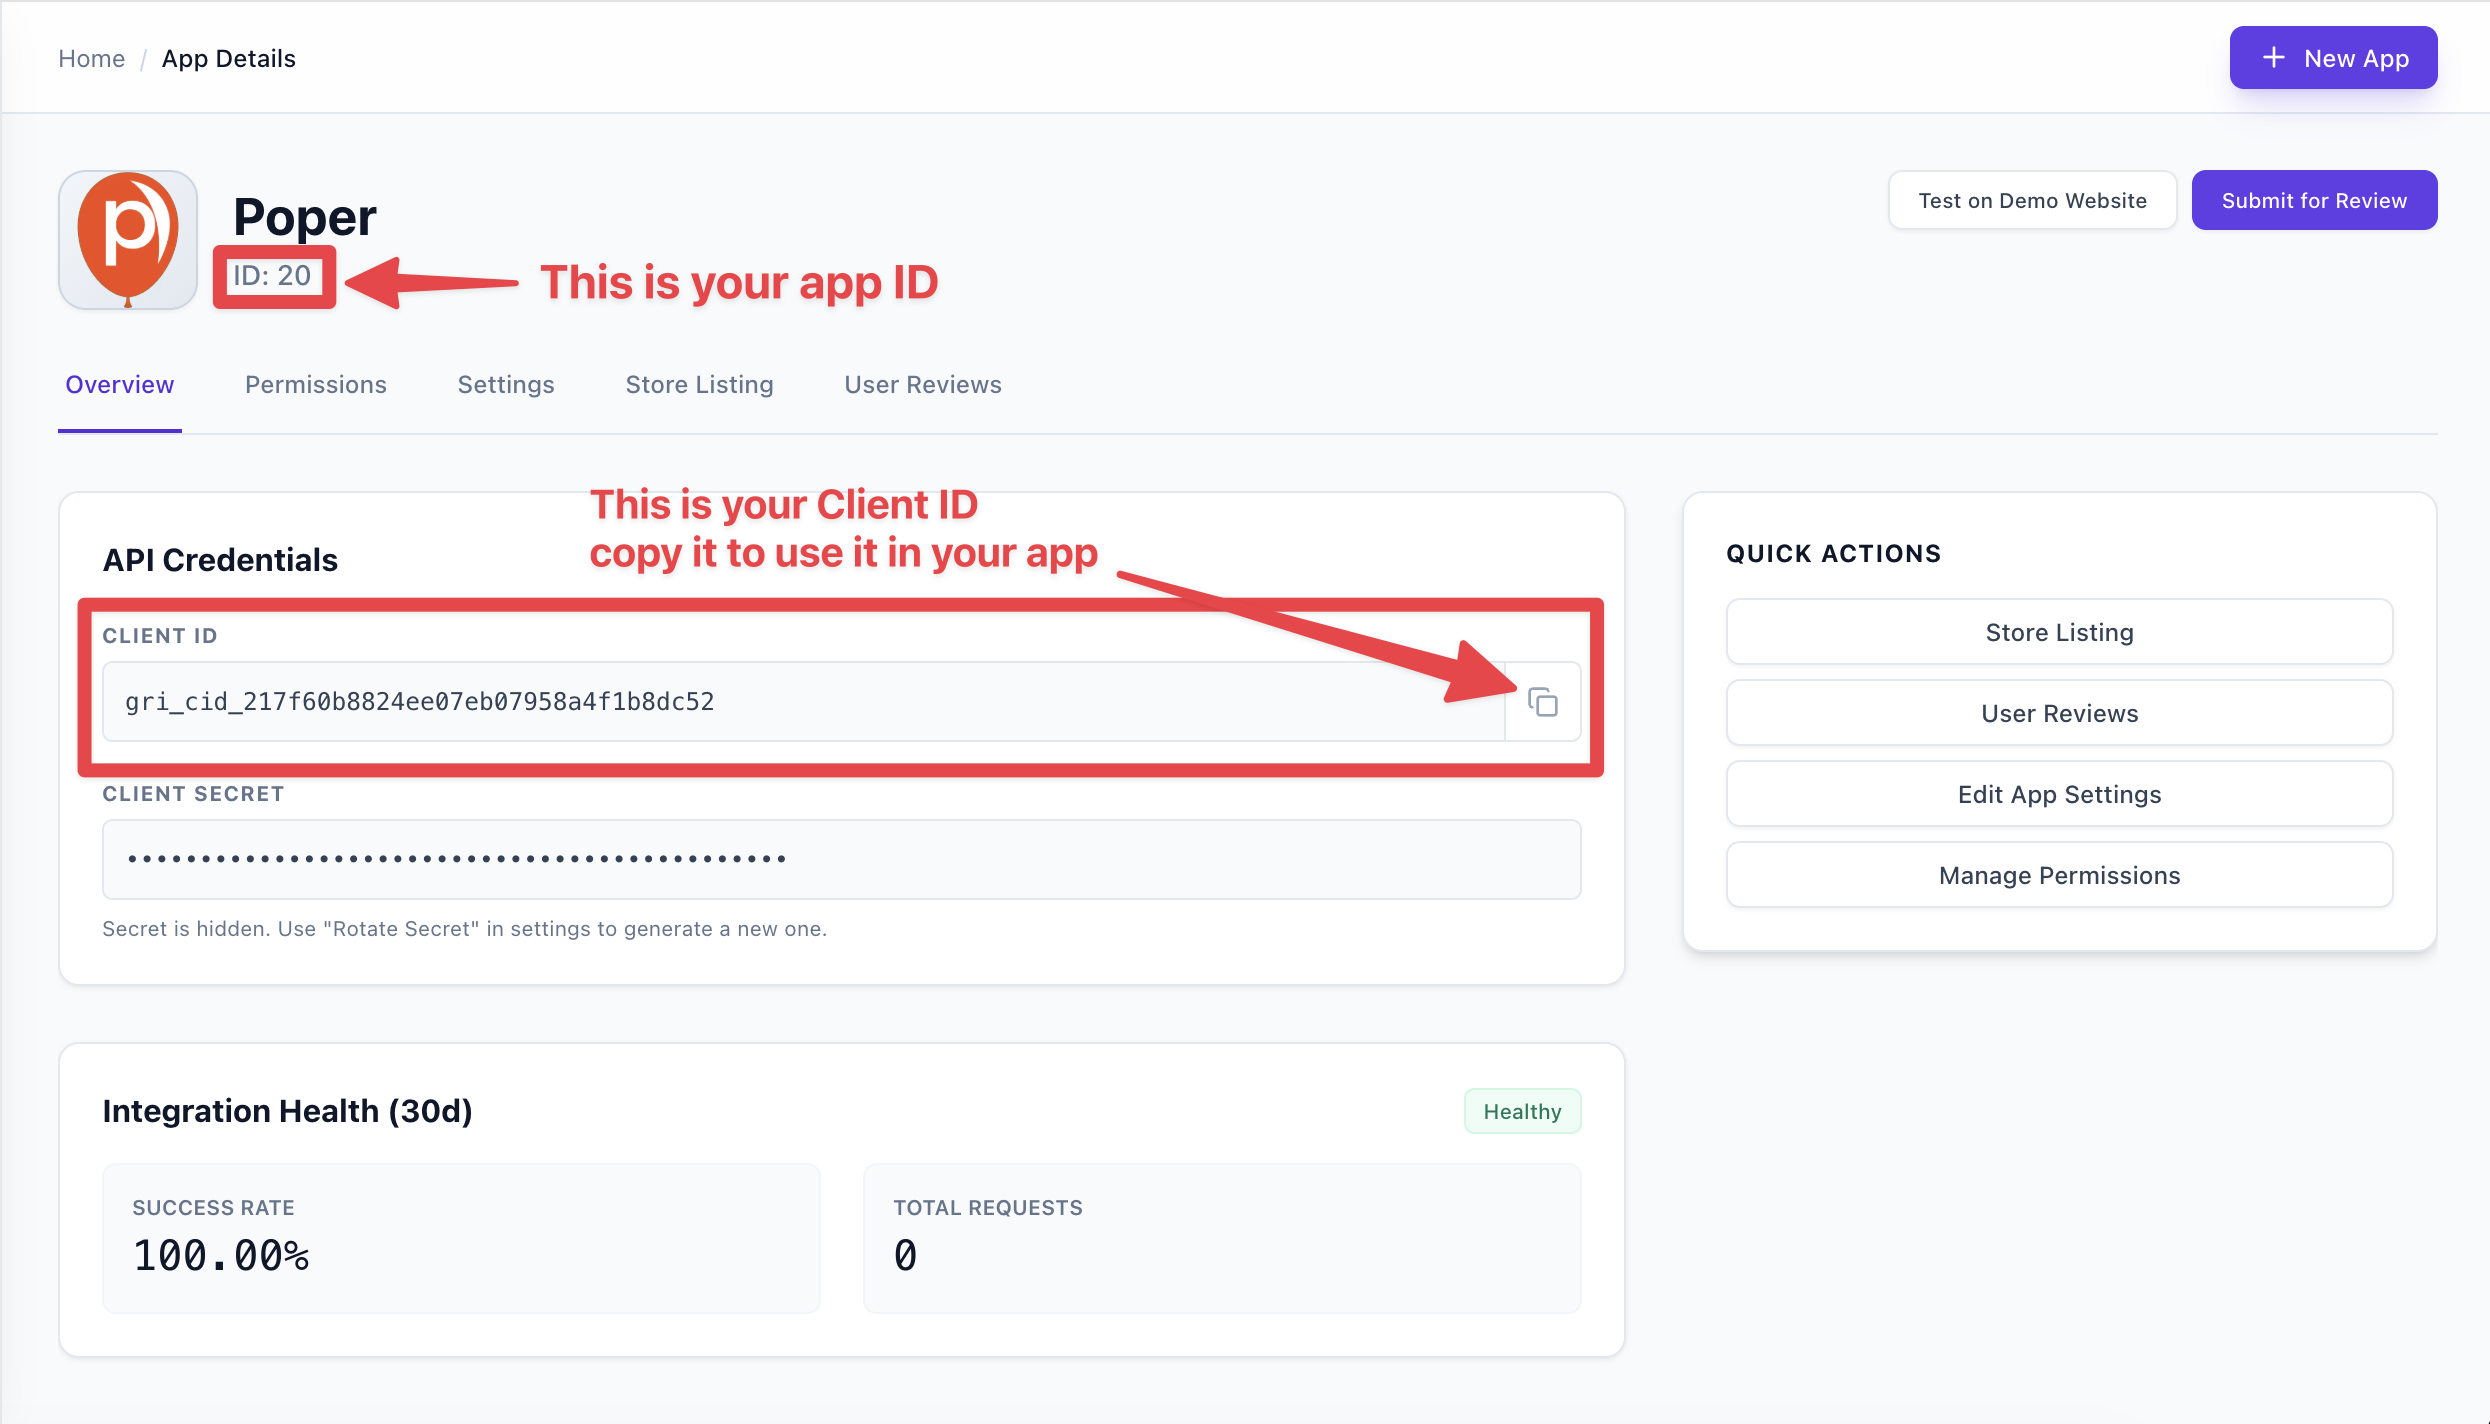
After the app is created, you’ll see the App Created screen with your Client ID and Client Secret. Copy the secret now — it is shown only once.
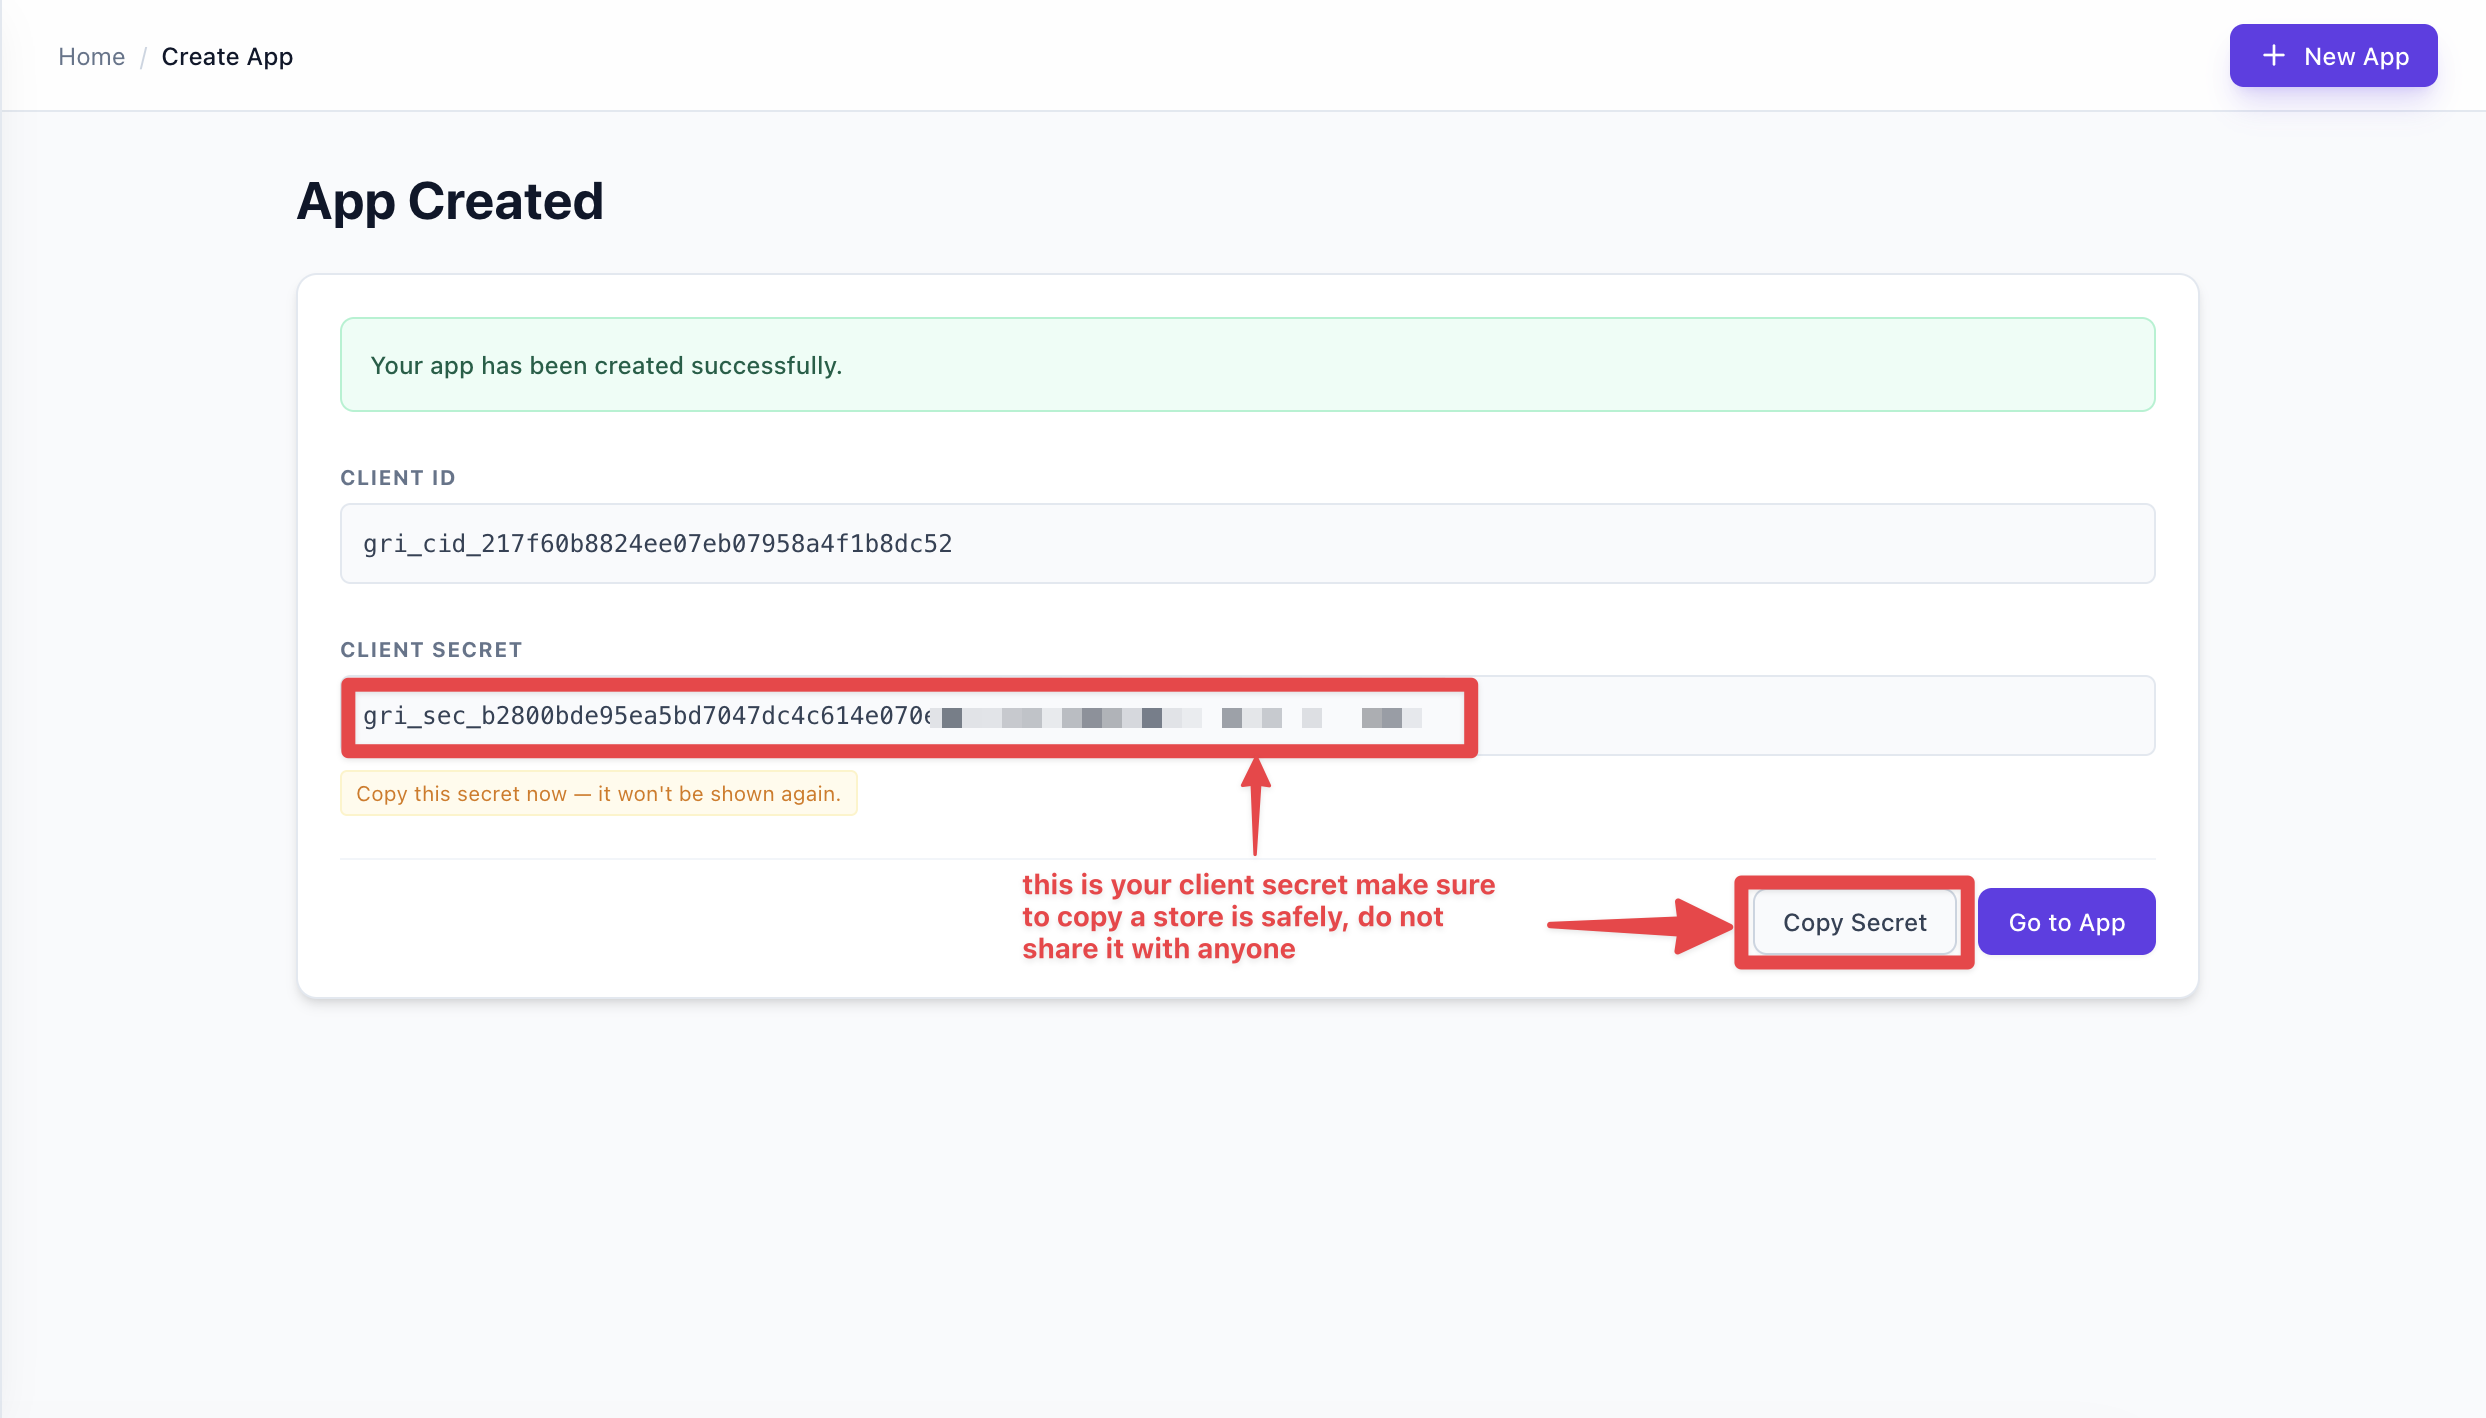
- Client ID — You can copy it; it’s also visible later in the app’s Overview.
- Client Secret — Shown only on this screen. An amber notice says: "Copy this secret now — it won't be shown again." Use Copy Secret to copy it, then store it securely (e.g. in your backend environment variables). If you lose it, you can generate a new one from the app’s Settings (Rotate Secret).
- Go to App — Takes you to the app’s detail page (Overview, Settings, Store Listing, etc.).
What’s next
- Use the Client ID and Client Secret in your backend to implement OAuth (authorize users and get access tokens).
- In the app’s Settings you can later add or change the icon, redirect URIs, and scopes.
- When you’re ready to list the app in the Grigora App Store, complete the Store Listing and Approval steps.